
- No products in the cart.
")
")
")

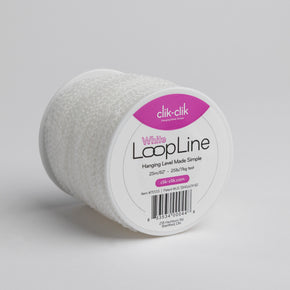
LoopLine Black (25m/82ft)
$9.90
per spool
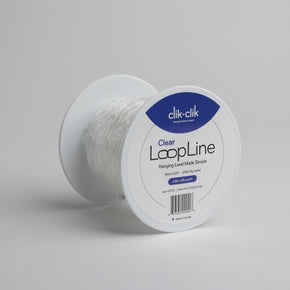
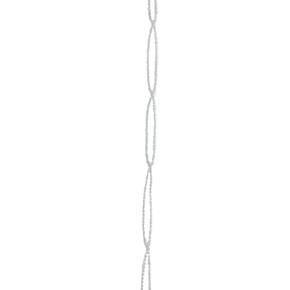
LoopLine is a line of repeating loops. These loops make it easy to hang signs level.
Maximum holding weight of 25lb/11kg
The most efficient line anywhere! Toss your fishing line/wire cable and forget about tying knots or crimping. The built-in loops makes the connection!
How to use the 'built-in' loops to hang self-leveling displays?
- With scissors, cut 2 lines, each with the same number of loops.
- Loop onto the display and the ClikMagnet.
- You are done! Your display hangs level!
- LoopLine™ is easy to un-loop to re-use onto another display.
Why LoopLine™?
Have you ever cut several lines of cord/string or fishing line of equal lengths? Then, working carefully, attached those lines, with knots, to your display to be hung…only to find the lines are no longer symmetrical and your item is hanging lopsided? With frustration, have you cut the attached lines (shorter), and tied your knots again, while wondering if it will hang level? These frustrations are in your history.
LoopLine™ can do what ordinary cord/chain cannot!
LoopLine™ makes attaching line... SIMPLE & FAST.
Weight per spool: (.11 lb/.05 kg)
- Description
- Safety
- Reviews

LoopLine™.
- LoopLine™ is a patented line made of continuous 2”/5 cm loops.
- LoopLine™ makes it quick and easy to hang level displays.
- LoopLine™ is easy to un-loop to re-use onto another display.
How to Choose LoopLine™ for your Project.
- Weight of the display to be hung.
- Colour of the ceiling. Note: LoopLine™ Clear is ideal for most applications.
How to use the MagPole to Measure Line Length.
- Extend the MagPole and lift it to touch the ceiling. Hold it to the ceiling.
- Visualize a spot on the MagPole where the top of your display would be positioned when it is hanging from the ceiling, for example – Second hole from the tip.
- With the MagPole still extended, gently lay it on the floor.
- Using LoopLine™, measure the distance from the visualized spot on the MagPole to the tip of the MagPole
- The measured distance is the length of line required to hang your display at the desired position from the ceiling.


How to Cut Two Lengths of LoopLine™.
(Each with the Same Number of Loops per Length.)
-By Hand:
- While the LoopLine™ is still on the spool, move your hand over a length of the LoopLine™ to pinch the knot at the required length (number of loops). This is the length required between the display item and the ceiling. See: How to determine length of LoopLine™.
- Look to the second knot past where you are pinching and fold the line so the second knot can also be placed into your pinch.
- Cut the lines slightly above the two knots.
- Still (initially) holding the two knots, gently slide both lengths through your hand (unwinding from the spool), and while making sure the knots are aligned.
- Cut the second length. The LoopLine™ is ready to be attached between the display and two ClikMagnets.
How to Cut Multiple Lengths of LoopLine™.
(Each with the Same Number of Loops per Length.)
-With a Stationary Hook:
- Cut one length of LoopLine™ the desired (number of loops) length. This is the Template Line to cut additional lengths with the same number of loops.
- Mark the Template Line to identify this length of LoopLine™.
- Place the template's first loop over the hook.
- Pulling LoopLine™ from the spool, place the new, first loop over the hook and over the loop of the Template Line. Slide both lines through the hands making sure the knots are aligned.
- Cut the second length of LoopLine™ to the same length/(number of loops) as the Template Line.
- Repeat.


How to Attach LoopLine™ to a ClikMagnet.
Method 1:
- Insert the first loop through the centre ring of the ClikMagnet.
- Bring this loop fully over and around the ClikMagnet. The line will rest around the ring.
- Pull tight.
Method 2:
- Insert the first loop through the ring of the ClikMagnet.
- Pull the free end and the rest of the LoopLine™ through this first loop.
- Pull tight.
How to Attach LoopLine™ to a Display.
Method 1: (With a ClikMagnet attached to one end of the length of LoopLine™.)
- With the ClikMagnet attached to one end, insert the other end’s first loop through the attachment place on the display.
- Insert the ClikMagnet and the rest of the line completely through this loop.
- Pull tight.
Method 2:
- Insert the first loop through the ring of the ClikMagnet.
- Pull the free end and the rest of the LoopLine™ through this first loop.
- Pull tight.
- Note: Then connect the free end of the LoopLine™ to the ClikMagnet by inserting the free loop through the ring of the ClikMagnet and bring it fully over and around the ClikMagnet. The line will rest around the ring.
- Pull tight.


How to Connect Two Equal Lengths of LoopLine™ to One ClikMagnet.
(Each with the Same Number of Loops per Length.)
- Cut two lengths of LoopLine™ with the same number of loops.
- Partner/pair the end loops of both lengths – to look like one loop.
- Attach (in one motion), the partnered loops to the ClikMagnet’s centre ring. (Put the partnered loops through the ClikMagnet’s centre ring, over and fully around the ClikMagnet and the centre ring. The partnered loops will settle as one around the centre ring.)
- This method keeps the display level. The display is likely to rotate.
How to Remove LoopLine™ from a Display and a ClikMagnet.
- Thread the long/connecting end of the LoopLine™ through the loop that is around the display’s attachment point- or - the ClikMagnet’s centre ring. Pull to disconnect.
- Next: Re-use the LoopLine™ on the installation of the next display.
Why Remove LoopLine™ from a Display.
- Because the LoopLine™ is re-usable.
- Because it is easy to remove LoopLine™.
- Because the LoopLine™ when removed, is the same length as when used for the installation. (Note: Regular cord would likely be cut to be removed therefore making it shorter. With LoopLine™, there is no need to cut to remove.)
How do I use LoopLine™ if the ceiling is slanted and my item needs to hang level?
- An easy solution is to add one or more rings to one of the ClikMagnets until the ceiling differential is eliminated. The rings make it easy to know which side of the sign needs the greater length.
- A mathematical solution: How to calculate the length of LoopLine™ for Slanted Ceilings.
What are the benefits of using LoopLine™ horizontal?
Additional lines of varying lengths can be attached to individual loops. It is an easy methods to keep these lines in position. Ideal for suspending many items from the ceiling using only two ClikMagnets and not a ClikMagnet for every item hung.
Customer Reviews
Based on 4 reviews
Write a review

RELATED PRODUCTS


LoopLine Black (100m/328ft)
LoopLine is a line of repeating loops. These loops make it easy to hang signs level. Maximum holding weight of 25lb/11kg The most efficient line anywhere! Toss your fishing line/wire...
LoopLine Clear (100m/328ft)
LoopLine is a line of repeating loops. These loops make it easy to hang signs level. Maximum holding weight of 25lb/11kg The most efficient line anywhere! Toss your fishing line/wire...
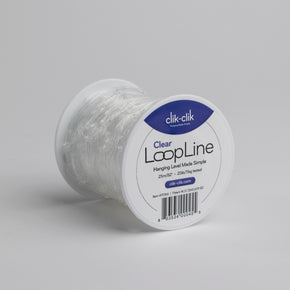
LoopLine Clear (25m/82ft)
LoopLine is a line of repeating loops. These loops make it easy to hang signs level. Maximum holding weight of 25lb/11kg The most efficient line anywhere! Toss your fishing line/wire...


LoopLine Light Black (100m/328ft)
LoopLine is a line of repeating loops. These loops make it easy to hang signs level. Maximum holding weight of 5lb/2kg The most efficient line anywhere! Toss your fishing line/wire...

LoopLine Light Clear (155m/508ft)
LoopLine is a line of repeating loops. These loops make it easy to hang signs level. Maximum holding weight of 10lb/4.5kg The most efficient line anywhere! Toss your fishing line/wire...

LoopLine Light Clear (50m/164ft)
LoopLine is a line of repeating loops. These loops make it easy to hang signs level. Maximum holding weight of 10lb/4.5kg The most efficient line anywhere! Toss your fishing line/wire...
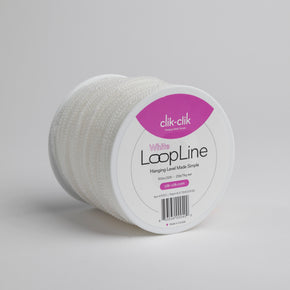

LoopLine White (100m/328ft)
LoopLine is a line of repeating loops. These loops make it easy to hang signs level. Maximum holding weight of 25 lbs/11kg The most efficient line anywhere! Toss your fishing...
LoopLine White (25m/82ft)
LoopLine is a line of repeating loops. These loops make it easy to hang signs level. Maximum holding weight of 25lb/11kg The most efficient line anywhere! Toss your fishing line/wire...