- No products in the cart.
FlatHat
$71.50
20/bag + 20 hoops
Easy to reach to hang ceiling display. To reduce the reach
FlatHats are designed to be suspended from the metal beams of very tall ceilings. They have metal on the inside. This metal will receive the Round ClikMagnets and the Mini ClikMagnets.
Sometimes, instead of lifting ClikMagnets to the metal on very tall ceilings, it is easier to lift Round ClikMagnets to the metal inside the suspended FlatHats.
The FlatHats can be suspended to your desired height, the height that makes the reach to the FlatHat easier than to the metal on the ceiling.
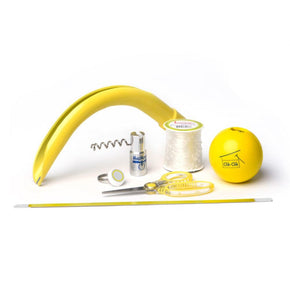
Each FlatHat is provided with a 3” Diameter Round Metal Ring. The metal ring is not required for all installations. For installation of the FlatHat see Clik-Clik Banana Kit.
Magnet Dimensions: 1.5″ x 1.5″
Weight/bag: (.55 lb/.25 kg)
SKU: 95500
All Products,Very Tall Ceiling Solution
- Description
- Safety
- Reviews

Product Description:
- Colour: White
- Lightweight
- Durable Polycarbonate
- Re-Usable – over and over again
- Metal on the inside has high iron content
- Easy to remove and replace around the beam of another location
- The FlatHats can be positioned wider or narrower than the display because the connecting line will move to the attachment points of the display.
How to Install FlatHats from Ceiling Beams: See Clik-Clik Banana Kit
How to Use the Sliding Dual MagMover 24” PRO to Install a Display from Suspended FlatHats.
- Thread the Sliding Dual MagMover 24” PRO onto the end of a MagPole or a One Button Pole.
- Slide the Sliding MagMover 24” PRO posts to the same distance apart as the distance between the attachment points on the display.
- Connect the display (with LoopLine™ – or with FlushMount Clips) from each attachment point to each Round ClikMagnet’s centre ring.
- Place each Round ClikMagnet’s centre ring over the orange side of the MagMover post.
- Lift the assembly to the metal inside the first FlatHat. Allow the first Round ClikMagnet to “clik” to the metal. Walk to the next FlatHat. Lift the assembly to allow the second Round ClikMagnet to “jump” to the metal. Your display is hung!


How to Use a Sliding dual MagMover 24” PRO to Safely Retrieve a Display from Suspended FlatHats.
- Thread the Sliding Dual MagMover 24” PRO onto the end of a MagPole or a One Button Pole.
- The Sliding MagMover 24” PRO’s posts, must be the same distance apart as the attachment points on the installed display.
- Turn each corkscrew outward.
- For displays using LoopLine™, fully insert one corkscrew through the centre ring of the first ClikMagnet. Pull down. Fully insert the next corkscrew through the centre ring of the second ClikMagnet. Pull down.
For displays using FlushMount Clips, fully insert both corkscrews through the centre rings of the ClikMagnets - as shown. Pull down. The coils of the corkscrews will hold the ClikMagnets (+ display) from falling.
Note: For easy take down stand close to the underside of the display.
Note: Remove from the display, the connecting LoopLine™ or FlushMount Clips with their ClikMagnets. These are ready for the installation of the next display.
What is the purpose of the FlatHat?
To be able to hang/remove signage in areas where the ceiling height is greater than the reach of the MagPole…. while standing on the floor.
Does the FlatHat create a permanent sign location?
Yes. However, the FlatHat is small and if signage is not required at the location, it will not be visually distracting. It will be ready when signage is required.
How long should the aircraft cable be?
The lower end of the cable should be the higher than the expected top position of the sign. If the sign sizes are varied, the cable could be shorter and the length difference filled with LoopLine™. An advantage of the FlatHat is that a shorter extension pole can be used because the reach needs to be to the FlatHat and not to a tall ceiling…. while standing on the floor.
What kind of aircraft cable should be used and why?
The thicker the aircraft cable (3/32 in/2.54mm or greater), the less stretch in the cable. If there is stretch in the cable, the pull to remove the Round ClikMagnet from the FlatHat causes the cable to stretch, and the release of the Round ClikMagnet will cause the thin aircraft cable to quickly retract and “boing” around ceiling rafters etc.
Why is it important that the width of the Dual MagMover – for the FlatHat – be EXACTLY the distance between the sign grommets?
It would be impossible to remove the sign if the distance is not exact. It is impossible because as one Round ClikMagnet is captured, the movement of the MagMover to the second Round ClikMagnet causes the sign to push the aircraft cable ahead of the sign. The install and removal of the Round ClikMagnets becomes very easy and quick to do when the width of the MagMover is the same as the distance between the grommets.
What assembly is required for the FlatHat system?
Aircraft Cable needs to be securely fastened to the ceiling. A loop needs to be made in the lower end of the cable to accommodate the FlatHat.
Customer Reviews

RELATED PRODUCTS
Clik-Clik Banana Kit
Tools to suspend FlatHats Tools to suspend one or more FlatHats from ceiling beams - while standing on the floor. The Clik-Clik Banana Kit includes: Banana, Ball Weight (for open...
Round ClikMagnets #10
Ceiling Magnet. Holds up to 10lbs/4kg These neodymium Round ClikMagnets #10 with one ring, “clik” to any metal that contains iron. They are ideal for attaching to the T-bars of most suspended...


